Lessons Learned by a Software Guy Venturing into Hardware
I’ve been in the software game for almost 30 years professionally, with another 10 dabbling in programming. I’m one of those who think anyone can code, but creating a software product is a feat few can achieve. It might sound a bit arrogant, but I know how to make and sell software products. However, hardware was an entirely new world for me. I found it to be an unforgiving, harsh, complex terrain… yet incredibly rewarding. Join me in this post as I share my journey in developing the SidecarT. Fair warning: some of my views might stir up controversy, but you’ll surely walk away with valuable (or debatable, depending on how you look at it) lessons.
What is SidecarT?
SidecarT is a ROM cartridge emulator for the Atari ST, STE, and Mega series, powered by the Raspberry Pi Pico’s RP2040 microcontroller. It supports the emulation of 64Kbyte and 128Kbyte ROMs, facilitates real-time interaction with the cartridge bus, and can emulate various devices, including hard and floppy disks. The open-source, customizable architecture of SidecarT encourages technological experimentation.
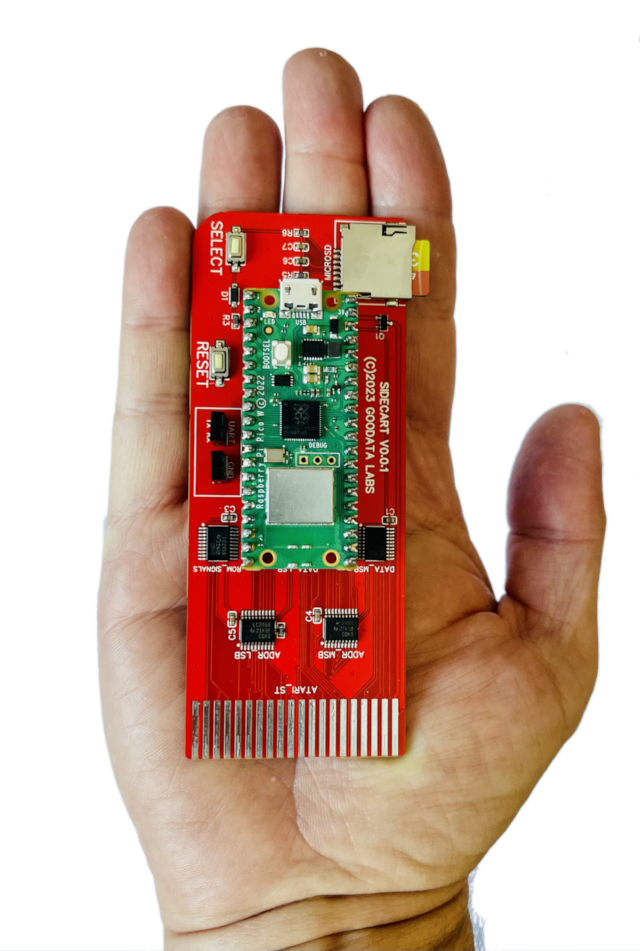
Essentially, SidecarT integrates hardware to enable seamless communication between the RP2040 microcontroller and an Atari ST. All this magic (or, rather, engineering) is driven by sophisticated coding. To get a fuller understanding of the design, I recommend reading the previous articles on our blog.
First and Most Important Lesson: If You’re Here for the Money, You’re in the Wrong Place
Professional hardware design is a Herculean task, accessible to only a few. The primary reason is the critical importance of economies of scale in this field. In software, the scale problem has largely disappeared, thanks to the end of physical distribution and the advent of cloud computing. However, in hardware, this challenge persists. Tools have improved tremendously (more on this later), but manufacturing and logistics remain fundamental. Tony Fadell’s book “Build” - one of the fathers of the iPod and Nest - offers excellent insights into this aspect (Obviously, if you are the next Tony Fadell, yes, indeed, you are in the right place!).

But what I’m talking about here is something different; it’s about being a “Maker.” It’s about creating a side project for a specific user segment, like retro computing enthusiasts, in a tiny market, maybe just a few hundred interested users. So the motivation can’t be money. It should be about having fun, learning, meeting interesting people, and contributing to communities. And if you make some money along the way to buy more old gadgets, then that’s fantastic.
Be Prepared to Lose All Your Money
If you’re planning to design a hardware product, be ready to invest a significant amount of money in your lab. You’ll need various tools, from a quality soldering iron to an oscilloscope. Expect to make some mistakes in purchasing materials. And importantly, consider the space needed to store everything properly. How much should you invest in your lab? Roughly what you’d spend on a very high-end computer for software development. The money spent on the lab is a long-term investment if you plan on future projects. But if you’re just experimenting and likely to sell the equipment on eBay sooner rather than later, spend wisely.
Another crucial aspect is the cost of producing prototypes. Prototypes are investments; whether they succeed or fail, they help you build better final products. However, if you’re investing in producing the final product with irreparable flaws, it can be disastrous. If these critical flaws emerge after the product reaches your customers, forcing refunds or replacements, the situation turns catastrophic.
If you can’t afford to lose it all, don’t sell your product to anyone. Some do and then abandon their customers. That’s against my ethics.
Study Hard and Ask Questions
Any software developer with time and dedication can venture into hardware development… if they study A LOT. There’s abundant content online to learn the basics of hardware design. My background in Computer Science, which included fundamentals of computing, laid the groundwork for diving into topics like how level shifters work between 5-volt TTL and 3.3-volt CMOS architectures.
Asking an expert and getting explained is invaluable, but what I found particularly disheartening is the treatment of ‘noobs’ in amateur electronics forums. Being insulted when asking questions is not pleasant. I thought ego issues were unique to software development communities, but they were not. If you need to ask questions on the forums and you’re learning, you better have tough skin.
Prototype, Prototype, and Prototype Again
A software developer builds a prototype of their product every time they compile. A hardware developer might take weeks (or months) to have a functional prototype. In software, we’ve diminished the importance of the prototype to the point of not using the term unless it’s for demonstrations to clients or users. In hardware, the prototype is everything.
It’s crucial to understand what we aim to achieve with a prototype and to accept that we will have to invest significant money and time (but aren’t they the same thing?) until we attain a fully functional one. An early-stage prototype only needs to demonstrate that an idea is feasible, while another might be focused -for instance- on whether the product can be manufactured in four layers.
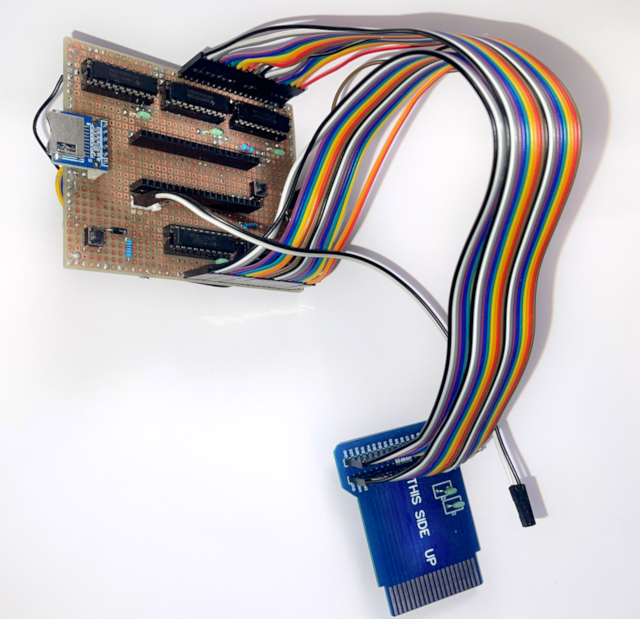
An initial phase prototype could be built on a breadboard or a test copper board. In contrast, a final stage prototype is likely manufactured by a specialized company using our designs in standard formats (more on this later).
I suggest that you prototype as much as your budget and time allow. And in the final prototypes, aim the design towards the final production. If we can repurpose the design of a final prototype as the final product, let’s do it.
If It Can Be Done with Code, Don’t Do It with Hardware
A closer look at the SidecarT reveals that its mainboard is a bridge between different physical realms: TTL and CMOS, 5 volts and 3.3 volts, address/data buses and GPIOs, microSD card and floppies/hard disks/ROMs… It’s this interaction with the physical world that the SidecarT handles reasonably well. In developer terms, there’s no ‘business logic’ in the mainboard.
All the ‘business logic’ is managed by the RP2040 microcontroller with the code I’ve written. The ROM emulation is purely a code-driven capability, to the extent that emulating ROMs for other retro computers is possible by merely modifying the SidecarT mainboard to fit the physical reality of these computers.
From the start, I realized that implementing any logic at the hardware-electronics level could be highly efficient but less versatile. Thus, I set a rule to avoid any logical functions on the SidecarT’s mainboard at all costs. This isn’t reinventing the wheel; it’s been a natural trend in hardware development for several years.
Hardware Design Tools Are Your Friends
For the first prototype’s design and manufacture, I used the entire suite of services and tools from JLCPCB. Though I’m exploring other tools and manufacturers now, it’s a great starting point.
JLCPCB has a partnership with EasyEDA (or are they the same company?) and allows any design created with EasyEDA to be directly fabricated by JLCPCB. EasyEDA is an online platform for PCB design and circuit simulation. It integrates with the component library of the wholesaler LCSC.com.
In line with the earlier point about studying, it’s worth emphasizing that mastering these tools will simplify your process. Over time, I’ve learned techniques I wish I had known earlier, like:
- If unsure, consult EasyEDA’s forums or contact their support. They are helpful.
- Prefer using ‘Basic parts’ over ‘Extended parts’ for cost-effectiveness in manufacturing.
- Utilize the built-in simulator to avoid problems.
- Be aware that through-hole components incur additional costs if machine-soldered. Decide whether to use SMT components or solder them yourself.
- For PCB design, consider using a routing tool other than EasyEDA’s default. I use FreeRouting.
- Choose parts with high stock levels. If you have to use a part with low stock, you might not be able to manufacture your board, and you may need to substitute it with an equivalent part. Or worse, you might have to redesign your circuit.
Manufacturing Isn’t That Difficult
Though I have no promotional deal with JLCPCB, my experience with them has been positive, as they made all SidecarT boards. The automation level in their processes is impressively high. Nowadays, you can quickly receive a batch of assembled PCBs ready for use in days, a significant leap from my experience with IoT device manufacturing about 20 years ago. I felt like using Amazon Web Services for the first time in 2006!
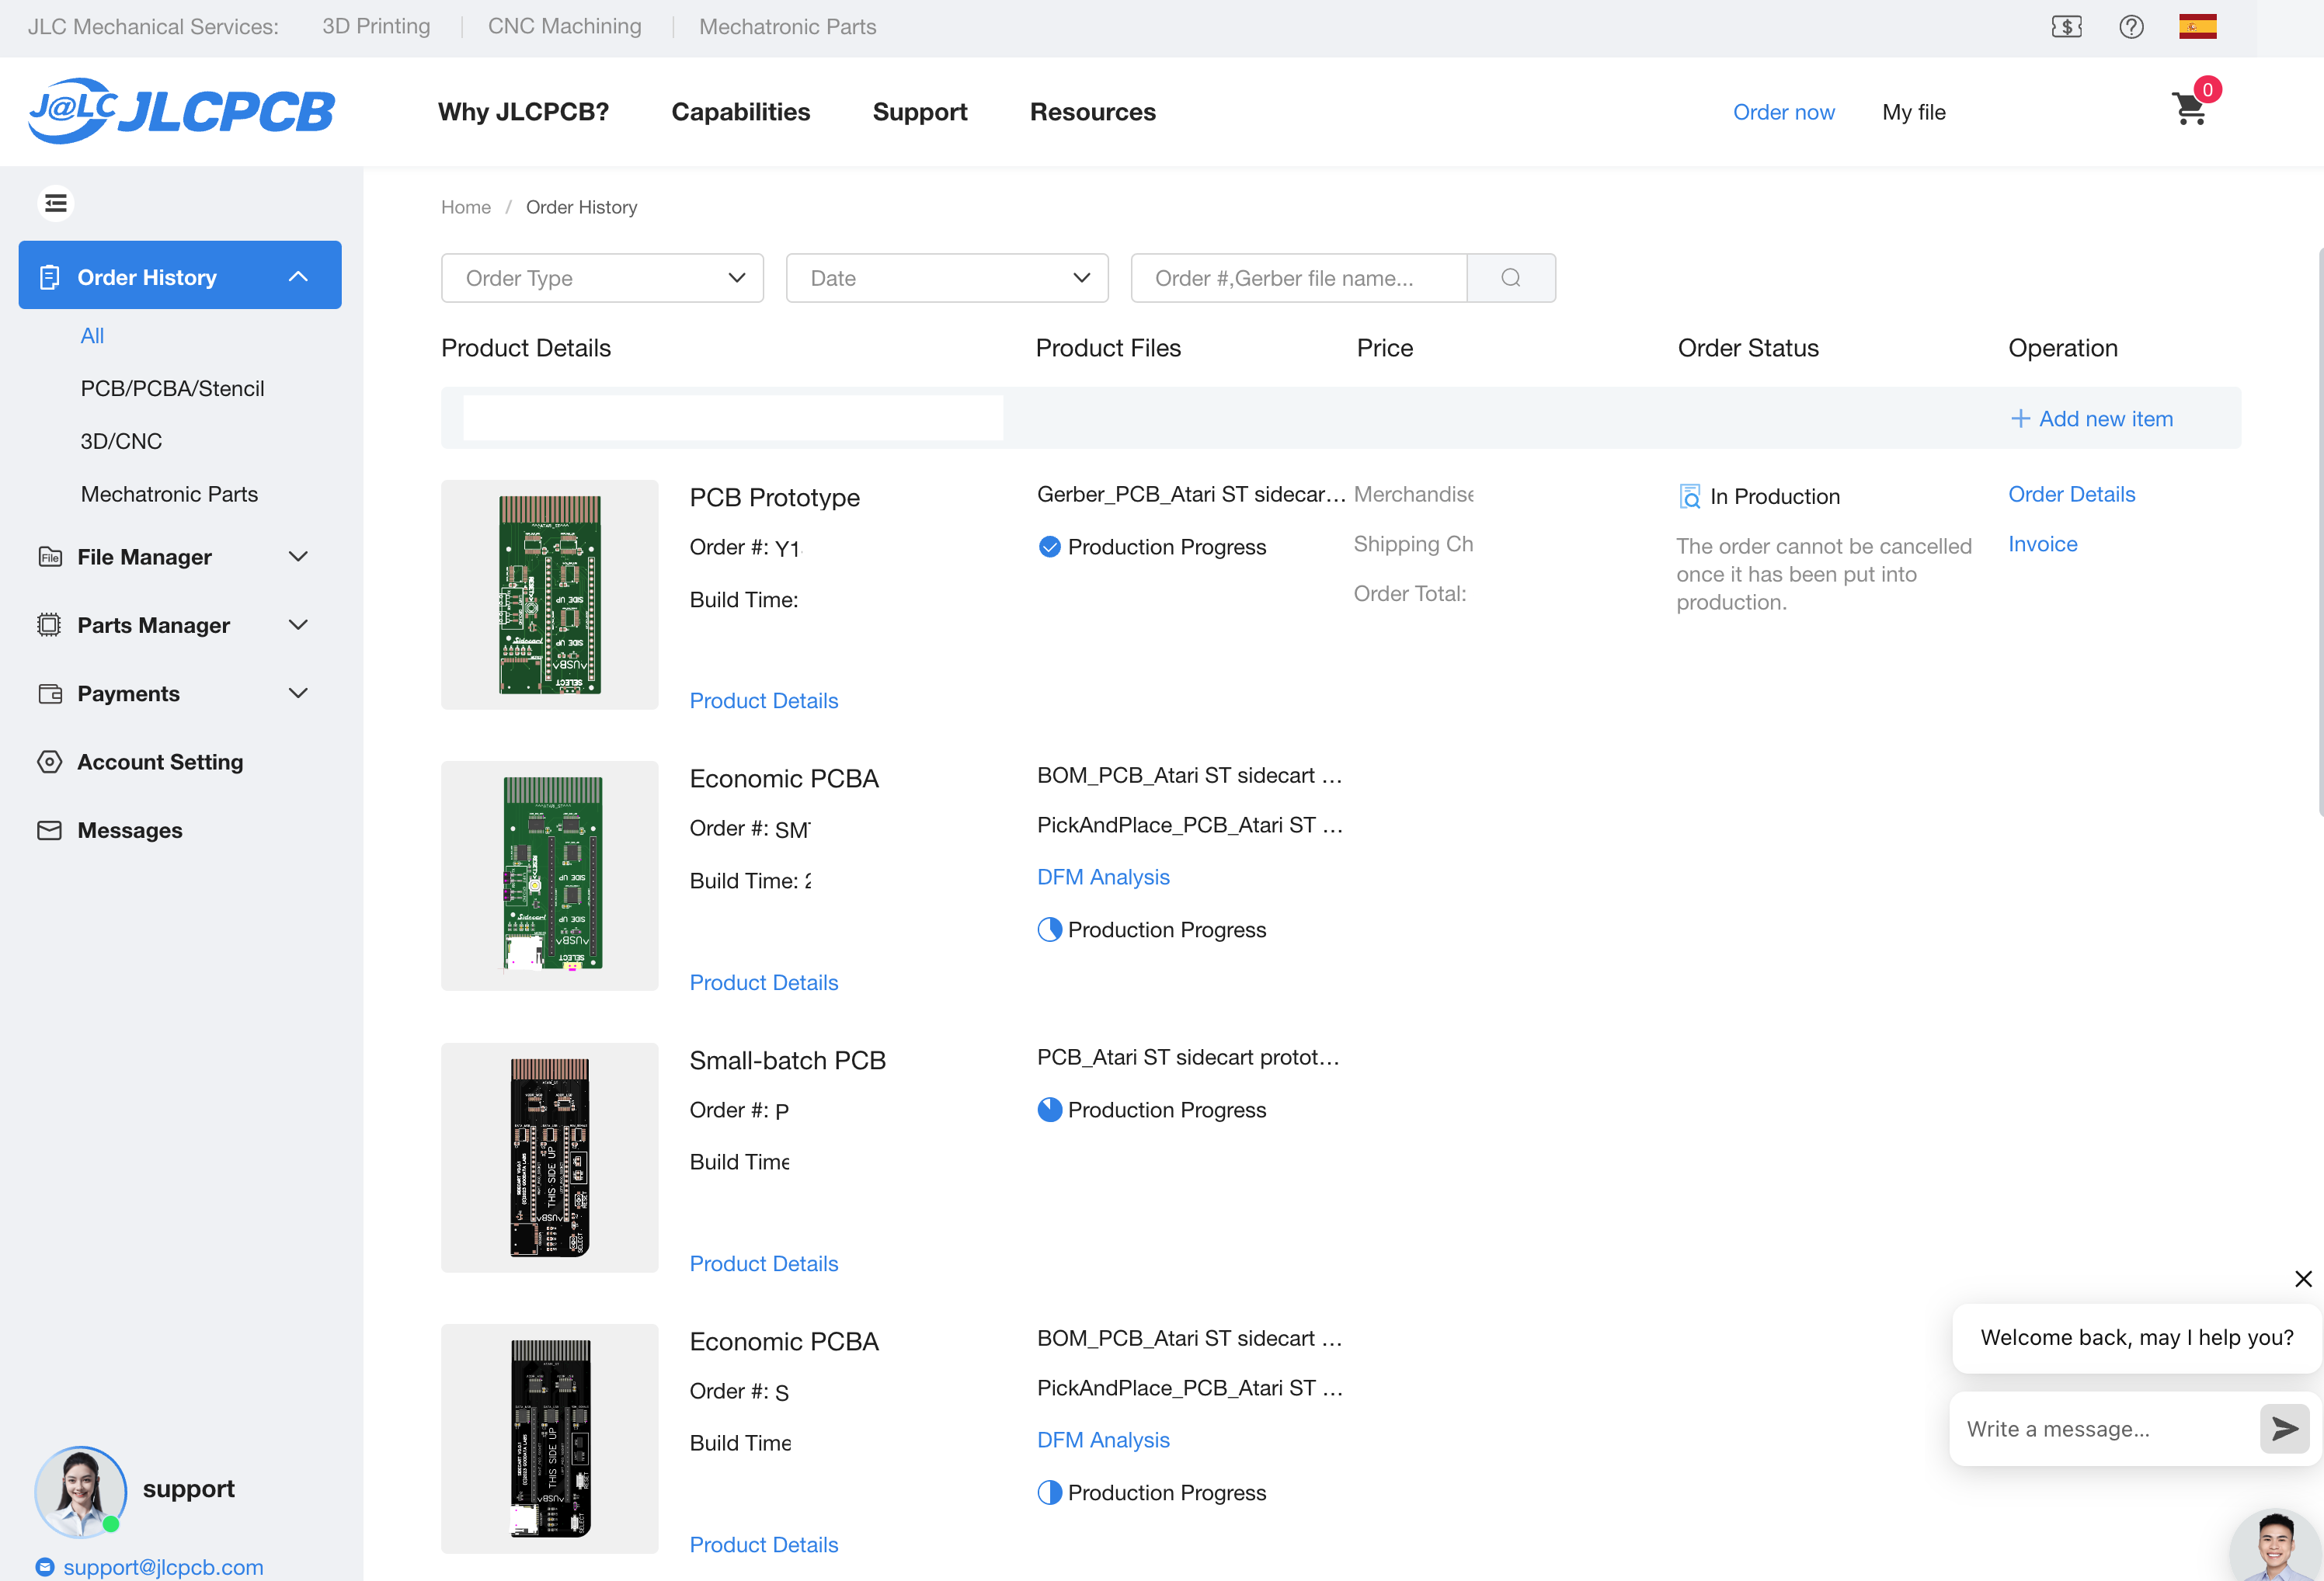
To manufacture a design, you need the Gerber file (the standard for PCB designs), BOM (Bill of Materials), and CPL (Component Placement List). Uploading the Gerber file auto-adjusts most parameters, but as a beginner, there were things I wished I knew:
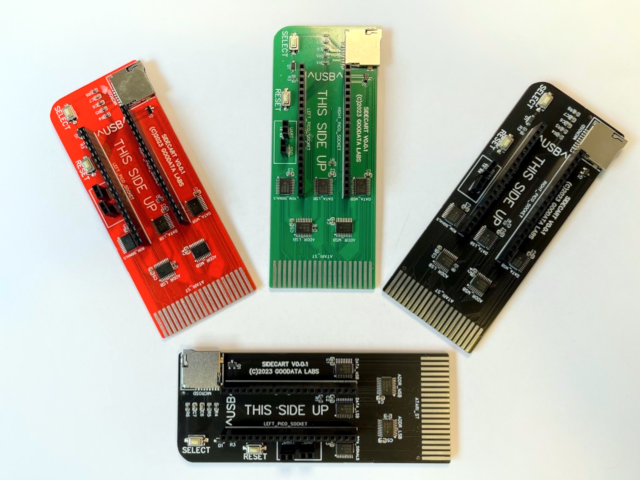
- Different PCB colors have varying costs. The cheapest is the most commonly used in their current production.
- Always check “Confirm Production File” to avoid issues.
- Always check “Flying Probe Test” for prototypes; it might be unnecessary for mass production.
- The Economic PCBA finish feels more ‘plastic’ than the Standard.
- Always opt for Confirm Parts Placement.
- With Economic PCBA, boards are always depanelized. With Standard, you’ll need to depanelize yourself or pay extra.
- Don’t forget to apply discount coupons!
When assembling parts, you may face delays if some are unavailable. My advice is to either replace the missing parts with an equivalent directly on the screen, ensuring they are genuinely equivalent and have the same footprint, or to purchase parts in advance using JLCPCB’s Parts Manager service, which stores them for you until needed.
Finally, choosing the right logistics company, shipping type, and handling customs charges is crucial. JLCPCB offers several logistics companies with two options for customs:
- Delivery Duty Paid (DDP): JLCPCB handles all VAT, duties, and customs clearance, charging you on the invoice.
- Carriage Paid To (CPT): JLCPCB covers shipping costs to the buyer, but you’re responsible for customs duties and taxes.
I’m still figuring out the best option, but FedEx combined with CPT seems more economical for me.
One thing I noticed is that JLCPCB often overestimates the weight and required shipping space, potentially as a standardized approach or an additional profit margin. Who knows.
Calculating Unit Cost Is More Complex Than It Seems
Calculating the unit cost of each SidecarT is more intricate than initially anticipated, especially if this project were a serious business venture. In such a case, factoring in my time spent on the project would make the cost of SidecarT remarkably high, requiring the sale of many units to achieve a reasonable price.
The cost per SidecarT unit is influenced by the decision to exclude my labor cost. Considering this, the cost breakdown includes:
- Laboratory expenses
- Various Atari ST test equipment
- Manufacturing costs (both successful and failed prototypes)
- Production of final devices
- Damaged devices (minor but not covered by JLCPCB)
- Units given for free to Beta Testers
- Units given for free to key community members
- Returns (Right of Withdrawal)
- Padded envelopes for shipping
- Antistatic bags
- Card with QR code linking to the Quickstart
- Sticker shipping labels
- Basic Shopify plan
- Stripe and PayPal sales commissions
- Hosting floppy disk images on AWS S3 (minor, but a cost)
- Administrative fees for my company management (also minor).
Shipping costs are entirely borne by the customer and, hence, not included in the unit cost.
Initially, I considered selling SidecarT personally, but the growing waitlist made me decide to sell through my company under the EU Consumer Protection Law, which is better for everyone.
Readers will notice that this list mixes elements with varying amortization periods: laboratory and test equipment (years), subscription plans (30 days), and stock-dependent items like SidecarT cards, envelopes, and bags. My goal isn’t to draft a business plan for SidecarT’s profitability but to gauge if this venture is economically feasible or not. This guidance is aimed at hobbyists and Makers, not those planning to manufacture hardware professionally.
Pricing is Hard, Deal with It
One immutable truth about pricing any product is that no one knows precisely what the right price is. There are various techniques for calculating a price and several basic rules to follow. There are essentially two basic strategies for pricing a product:
- Top-Down: You look at the market, compare it with similar products, and set a price you think is appropriate and that people will pay for. Yes, this is akin to guessing the price.
- Bottom-Up: In this model, you calculate your costs per unit and apply the gross margin figure you wish to achieve. This classic model theoretically guarantees profit. It’s a favorite among Excel lovers, but it certainly doesn’t ensure the price will be market-competitive.
These rules work great for a startup aiming for tens of thousands of users but are unrealistic for Makers. If you’re in the market of a few hundred devices, look for another device similar to yours and copy its price. That’s a Top-Down strategy. If your product is novel and exciting, add a reasonable premium to the price and go with it.
For SidecarT, I assumed the price should be in line with other microcontroller-based products for Atari ST with similar functionality. Despite SidecarT being effectively a coprocessor, it couldn’t compete with hardware acceleration solutions priced five times higher. SidecarT’s biggest problem isn’t the price but determining which market segment it should compete in. And honestly, I’m not sure if I’ve got it right. As I said: “Pricing is hard. Deal with it.”
Logistics Matters
If you suddenly need to ship 100 packages worldwide, you realize you have a logistical problem and that your decisions should aim to minimize the time spent on this task. Here are some decisions I’ve made to try to minimize and optimize this burden:
- Seek to Reduce Shipping Costs as Much as Possible: A high shipping cost deters sales, whereas a reasonable shipping cost is neutral, not influencing the decision. In my case, I aimed for all shipments to be under 100 grams, allowing me to send them as registered mail with tracking at a price below €10 always.
- Automate Data Loading and Label Printing with Postal Service Tools: Needless to say, this saves an infinite amount of time.
- Choosing Shopify for Its Logistic Management Support: Another reason I chose Shopify is because it aids in this management. Another factor was Tindie - a marketplace supposedly specialized in selling homebrew hardware - who didn’t pay any attention to me. So, I explored other possibilities and found that using Shopify’s basic plan was much better and cheaper. Thanks for giving me time to think, Tindie!
Essential Legal Considerations for Homebrew Makers
As a homebrew maker venturing into manufacturing and selling products, it’s important to navigate the legal landscape effectively, even on a smaller scale. Here are the key legal points tailored to your situation in the European Union:
-
Intellectual Property Rights: Not my case, but if your creation is unique, consider applying for a patent to protect it. For branding purposes, trademarks can safeguard your product name or logo. While this might seem overwhelming for a small-scale maker, it’s worth considering if your product gains popularity.
-
Consumer Protection Laws: Understand the basics of consumer rights in your country. This includes having clear return policies and adhering to quality standards. Being transparent with your customers about what they can expect from your product helps build trust and credibility. And don’t forget to add to your costs the Right of Withdrawal.
-
Data Privacy: If you’re selling online and collecting customer data, be aware of privacy laws. You don’t need a complex policy, but you should be clear about what data you collect and how you use it, especially if selling to customers in regions with strict privacy laws like the EU.
- Business Registration: Depending on the scale of your operations, consider if you need to register as a business.
-
Tax Obligations: Be mindful of your tax responsibilities, especially if you live in an aggressive tax country and not business-friendly like Spain.
-
Product Safety and Liability: Ensure your product is safe to use. Even as a small-scale maker, you could be held liable for damages caused by your product.
-
Shipping and Export Controls: Familiarize yourself with shipping regulations, especially if sending products internationally. This includes understanding postal rules and potential customs issues.
- Terms of Sale: Communicate the terms of sale to your customers. This can include payment terms, delivery timelines, and warranty conditions, if applicable.
Please address these legal aspects, at least at a basic level.
Let’s Wrap Up
Reflecting on developing the SidecarT and other projects, I realize this journey is about much more than manufacturing or logistics. It encompasses a holistic approach to homebrew hardware creation. Here’s a more comprehensive wrap-up:
Embrace Learning and Curiosity
- Study Hard, Ask Questions: The journey is a continuous learning process. Never hesitate to deepen your knowledge and seek advice from the community.
The Importance of Prototyping
- Prototype, Prototype, Prototype: Iterative prototyping is key. Each version teaches something new, helping refine your product.
Software vs. Hardware
- If It Can Be Done with Code, Don’t Do It with Hardware: Optimize your design by leveraging software solutions where possible. It can save time, reduce costs, and simplify the product.
The Role of Design Tools
- Hardware Design Tools Are Your Friends: Utilize design tools effectively. They can streamline your design process and help avoid costly mistakes.
Manufacturing Insights
- Efficient Manufacturing Partners: JLCPCB has been a reliable partner, offering automated and efficient services.
- Design Requirements and Challenges: Prepare for design and component selection intricacies.
Costing and Pricing
- Complexity in Calculating Costs: Include various factors, from equipment to administrative expenses.
- Pricing Strategies: Adopt a top-down approach, aligning with market prices and adding value where unique.
Logistics, Legalities, and Distribution
- Streamlining Logistics: Use tools and platforms like Shopify for efficient distribution.
- Legal Considerations: Consider legal aspects like intellectual property, consumer laws, and safety regulations.
In a nutshell, this maker adventure has been an incredible mix of dedication, learning curves, smart planning, and rolling with the punches. From the deep dive into hardware specifics to navigating the legal and market maze, it’s been a journey packed with lessons. Hey, whether you’re just starting out or a veteran in the homebrew hardware world, take every challenge as a chance to level up. Each prototype gets you one step closer to nailing it. So keep that curiosity alive, keep learning, and most of all, enjoy the ride!